On the last post we installed Active Directory. In order to get Configuration Manager ready for the install, we need to create some Organizational Units and accounts that will help organize how we will want to plan our install.
Go to Control Panel, Administrative Tools, and Select Active Directory users and computer. The default BluePalace domain is shown below:

Select the BluePalace.LAB domain and select File, New and Organization unit:

On the New Object – Organizational Unit, call the new Organizational Unit: SCCM

Select OK to create the new Container. In the new container select, New and User, fill in the following information:

Select Next to continue.
Add a password to the user account. Remove the checkbox user must change password at next login. Select User cannot change password, and password never expires. Enter the new password be sure to remember what the password is for the user.

Select Next to Create the user account.
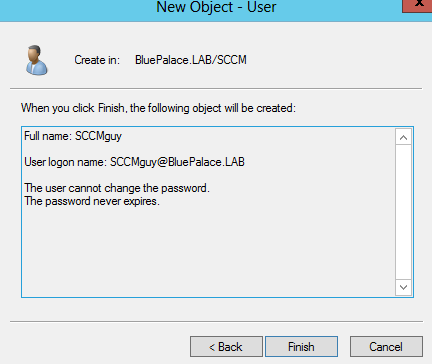
Select Finish to create the user account.
Create the following accounts in the container SCCM:
Name: Password: Groups:
SCCMagent SetPassword User, Service Account
Smsadmin SetPassword Schema Admin, Domain Admin, Administrators
Create a new Organizational Unit called SQL.
Create the following accounts in the container SQL:
Type: AccountName: Password: Domain Groups:
SQL Server Agent SQLAgent SetPassword User, Service Account
SQL Server Database Engine SQLDBEngine SetPassword Schema Admin, Domain Admin
SQL Server Analysis Integration Services SQLINTSvcs SetPassword User
SQL Admins SQLGuy, Jeff2SQL Password These accounts will have Complete Access to the SQL server
Now lets log out of the domain controller and log in with the SMSadmin account. This account will be logging into DC1. Mount the System Center Configuration Manager iso. We will need this ISO for this server because we need to extend the Active Directory schema. But first, we need to make an entry to the system container.
Go to Control Panel, Administrative Tools, and select Users and Computers. On the view, button select Advanced Features. You can now see the system container in Active Directory. This is where the change will take place from ADSI edit.
Now select ADSIedit from Administrative tools. Once it loads select Connect to, and select the default naming context. Go To CN=System.

Select New, and choose object.
On the Create Object page select container.
Call the container System Management.

Select Next and Finish to create this container.
Select the CN=System Management container and select Properties. This is so the configuration manager can update this structure. Select the Security Tab and select Add


Change object types to computers, and add the ConfigMgr server. Select OK to add this server.
Give the server Full Control over the container and select Apply and then OK to close this dialog box.

Extending the Active Directory Schema
Go to: D:\SMSSETUP\BIN\X64. Now run cmd. Type in extadsch.
This command extends the active directory schema. You can check the log it creates at C:\extADSCh.log. What this does is add a couple clients and attributes to the database, it is opening the file: D:\SMSSETUP\BIN\X64\ConfigMgr_Ad_schema.ldf. Which is a human-readable file that you can open with notepad and you can see all the changes it will make to Active Directory.
The next step involves adding SQL server to the configuration manager server.
Part 5 – Installation of SQL Server